Search This Blog

Thursday, April 30, 2015

Art Teacher Appreciation Door

I am getting my mind wrapped around ideas for Teacher Appreciation Week and found an idea on Pinterest. The original idea said, "The earth without art is just eh!" 

I noticed last year the art teacher's door was not decorated so I thought I would be prepared to decorate it just in case it is not taken care of this year.

My daughter helped me create these picture frames and mushroom for part of the decoration. Now all we have to do is get an Earth created and all the letters and it will be finished. 

I'll post a picture of the door once we get it up!


Tuesday, April 28, 2015

Apple Candy Jar

Long ago, I found this idea on Pinterest and filed it away. I do not know who the original person is who posted it though.


I made this with a small flower pot and a wooden piece that, to me, looked like a stem. 

I used acrylic paint to paint the pot red and the "stem" green. 

Once the paint dried (after three coats), I covered the entire pot and bottom with Mod Podge. 

I used Liquid Fusion to glue the stem to the bottom of the clay flower pot bottom.

Once the Mod Podge was dried, I filled the pot with Werther's Candies.


Hope you have a great day!

Thursday, April 23, 2015

Quilt Square Bag

I haven't had much luck making anything from quilt squares until now. Maybe because I used my Big Shot and square framelit to cut the squares!


This was made with some fabric in my fabric box. It turned out to be a little smaller than I wanted it to be, but it is just the right size for my granddaughter!

Here is the back...

Hope you have a great day!

Tuesday, April 21, 2015

Chocolate Triangular Holder

I made these for Valentine's, but these can be used for any occasion!

Connie at SimplySimpleStamping.com shared the first box. She decorated hers with hearts.

I decided to make mine with flowers so they could be used for birthdays, anniversaries, or Mother's Day.


Hope you have a great day!

Thursday, April 16, 2015

Bucket Bag

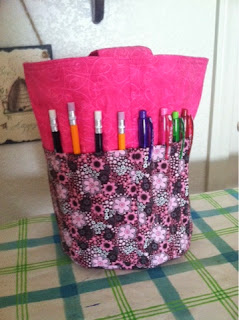
This was a fun bag to make!  I followed the directions from Craftsy - it's a free tutorial. 


Have a great day!

Tuesday, April 14, 2015

Baby Step Card

I saw this idea on Pinterest and had to try it out. I need to get another baby stamp to add things to this - there is too much open space on the step portion of the card.


Have a great day!

Thursday, April 9, 2015

Hey There Friend Cards

I was looking for something to do and this stamp jumped out at me. I stamped it twice and took to coloring it with Blendabilites from Stampin' Up!.

While stamping, it seemed like the opossums were talking to each other and it made me think of dear friends who live miles away. I found the greeting in my stash from a Paper Pumpkin kit I received sometime last year.


Hope you have a great day!

Wednesday, April 8, 2015

Wet Bag

I made this wet bag from PUL fabric I purchased when I was awaiting the arrival of my granddaughter that was over 2 1/2 years ago! How time flies! 


I watched a YouTube video and it reminded me of the fabric so I decided to make a Wet Bag for Ana's swimsuit. I thought it would be a great thing to have so everything else in the big bag would not get wet when she changes from a wet swimsuit into clothes.

Here is how I made it:

I used a 9" zipper and fabric that measured 7" x 22". I used some extra fabric to create the handle - I did not measure this piece, just cut and sewed.

Pin the fabric to the zipper with right side facing down and the zipper facing up. The fabric fits just inside the end/beginning of the zipper. Sew this with the regular sewing foot with the edge of the foot up against the zipper.


Once this is complete, flip the fabric so the right side is facing up and top stitch the fabric just as you did the first time. You may need to help the fabric stay near the zipper - this fabric is slippery and at times, hard to handle.


Now take the opposite end of the fabric and pin as you did when you first started and repeat the first two steps (sewing the fabric to the zipper and then top stitching).


This is what it looks like after you bring the fabric up and sew it onto the zipper.


This is what it looks like when you top stitch the second time


Now to add the handle and sew the sides ...

I tucked the handle into the side where the zipper opens ...


BEFORE you sew up the side, make sure you unzip the zipper (about 1/2 way) or you will not be able to open your bag! Trust me on this!

Sew up both sides. Clip corners if needed and turn the bag inside out. Voila! Your finished bag. I top stitched the sides of the bag to give it a more finished look.

I made the bag below with fabric that measured 12" x 38". This bag is big enough to hold lots of wet items. For little ones, it could hold clothes in the event of an accident or swimsuits for a couple of children.


I hope this is helpful. If you have any questions, feel free to leave a comment or send me an email.

Have a great day!

Tuesday, April 7, 2015

Gift Card Holder

I made these for my son and daughter-in-law for Easter. I am always sending the grandchildren a box, but rarely does it include something for their parents. Since they requested no chocolates this year, I sent them gift cards.


I hope they enjoy a lunch or dinner on us! 


Thursday, April 2, 2015

Happy Easter Card

I made this card for my sweet grandbabies!


Have a great day!